Showing posts with label DIY. Show all posts

2018-06-25

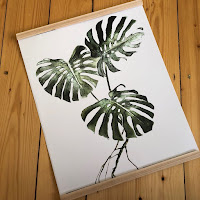
Magnetic Wooden Photo Frame DIY

If you paid attention to interior trends lately you probably noticed magnetic wooden photo frames. I really love how the simplicity of the frame makes the poster / painting / photo pop out. However, I didn’t like the price the frames come with. So I decided to dig a bit deeper and came up with a cheap and easy homemade version of the magnetic wooden photo frame.


What you need to make one frame:

- Wooden strips e.g. beech (mine are 2 cm / ¾ in wide)
- Magnetic tape
- Nylon thread (or any other thread you want to you for hanging the frame e.g. leather cord, jute yarn)


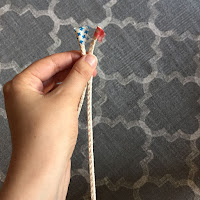
Start by measuring your poster / painting / photo and buy (or cut) four wooden strips with the appropriate length. Next cut and attach your magnetic tape. The tape I bought was quite strong so I ended up cutting in total four pieces of tape each 5 cm / 2 in long and cut each in half lengthwise. When attaching the tape to the wooden strips makes sure they’re all installed at the same position otherwise the magnetic effect won’t work. 


piastuff.compiastuff.com


Once you are done attach your thread of choice to one or two of the wooden strips. As I wanted to use a thin nylon thread I attached it to both upper wooden strips to give it more stability.

Now all you need to do is to add your poster / painting / photo and mount the magnetic wooden frame to the wall.


piastuff.compiastuff.com

I really love this cute frames and it’s such a simple and easy DIY plus you could also stain the wood to match the rest of your interior design.

What do you think?

2017-12-01

DIY Xmas Wreath


One thing I love about Christmas is definitely the color scheme: red, green, white and cold! This year I decided for the first time to make my own Xmas wreath. It was super easy and looked great – I even preserved it for next year but haven’t decided if I’ll use the old one or will make a new one (the nice smell of the twigs is obviously just something you get with a fresh wreath).

What you need:


- metal ring (gold)
- wire (gold)
- twigs (I used eucalyptus)
- little decorative figures (I used two turtledoves, obviously ;) )

Start off by cutting the twigs apart so you end up with single and shorter twigs. Use the wire to attach the twigs to the metal ring bending the twigs carefully. I used about two pieces of wire (each about 10 cm / 4 in long) per twig. !


Make sure to leave out a small 5 cm / 2 in part which you will use later to hang the wreath. Once your metal ring is nice and evenly covered add your decorative figures. Finally, attach a piece of the string to the 5 cm / 2 in gap and hang it on your door. I actually prefer to hang it inside the apartment on a door or wall as otherwise you won’t see or smell your lovely wreath. And that’s it


I’m already in the mood for Christmas – what about you?

2017-10-12

Macrame Curtain

This summer I struggled with a fly-problem: the plants and flowers on the balcony seemed to attract flies which then decided to take a peek into the bedroom.
As the window construction is quite old no screen door seemed to fit the measurements and screen curtains are usually quite ugly and take away a lot of light (I’m talking about those weird plastic strip curtains preferably sold in orange tones…).
An idea popped up in the back of my mind: “what about a macrame curtain? Didn’t you wanted to try out some macramé anyway? Maybe this is the perfect time and situation”. And that’s exactly what I ended up doing and I loved to macrame – it was so much fun and required quite a bit creativity as you need to handle a lot of string, think about the perfect pattern and find the right spot to do it.

You need:
  •     Wooden stick a bit longer than you want your curtain to be wide
  •       Macrame yarn e.g. this one
  •       Spikes or hookes to hang up the curtain / hold up the wooden stick

1. Start with thinking about the measurements you need: I wanted to make a curtain which was about 60cm wide and 200cm long with a pattern only in the upper quarter of the curtain. Depending on the project you are planning and whether you’re making the knots tighter or looser you need to calculate the needed length. 
I wanted to end up with a length of 200cm and thus already knew that each piece of string needed to be at least 400cm (as you fold each string in two) and added an additional 100cm so I ended up with a total length of 500cm. 
I had a rough idea what I wanted to the curtain to look like and ended up cutting 12 strings each 500cm (I started off with 10 but felt it was too loose and then added two more strings).


2. There is a pretty simple trick which I applied when cutting string: I measured one piece of string, applied masking tape and cut in the middle of the tape – this way you have tape left on each side. I additionally applied some masking tape to the other end of the string which in this case I didn’t need to cut as I was using a new ball of yarn. This piece of string was my ‘original piece’ and I measured and cut all other pieces against it using a different type of masking tape. I left the tape on the string until the very end when the whole project is done as the tape prevents the string from unraveling.


Piastuff.blogspot.comPiastuff.blogspot.com


3. Start wrapping your strings around your wooden stick using the Lark’s Head Knot.


Piastuff.blogspot.com


4. About 5cm below add a regular knot tying two neighboring strings together. Continue with regular knots until all strings are tied. Make sure you tie all knot either clockwise or counterclockwise but be consistent in your choice.

5. About 5cm below the regular knot continue with two Square Knots on top of each other – tying one clockwise and the other one counterclockwise.


Piastuff.blogspot.com


6. Repeat step 4 until you have 3-4 rows of Square Knots. Every second row the outer strings will just hang loose and will be incorporated into the pattern again with the next row of knots.

7. Finish off your pattern by repeating step 3. Your pattern should take up no more than the first quarter of the curtain as you still want to be able to walk through it.

8. Hang up your curtain using spikes or hooks. Once the curtain is in place give it a nice trim and you’re done!!


Piastuff.blogspot.com


I absolutely loved this project and macrame is a lot easier than I thought! I looked up a few of the knots on Google or YouTube but if you used to make charms for your friends in school a lot of these knots will be familiar to you. 
And the curtain totally serves its purpose and keeps the big flies out :) If you continue the pattern all the way until the end you can also make a beautiful wall hanging or room divider  just make sure to use enough string.


Happy tying,

2017-07-10

Mood Board Love – Easy DIY

At the moment you can find mood boards everywhere and I have to admit I’m also a big fan. I really love my little lightbox and how easy you can send cute messages or set the atmosphere using it.


Many cafes use mood boards to show their menu and special offers which I think is a cute idea. Thus I decided: I need one in the kitchen as well! Just as a fun element, to bring different vibes to the kitchen e.g. according to the seasons and to keep visitors busy while preparing dinner or doing the dishes. 

However, I didn’t want to spend a lot of money on it so I decided to DIY my very own mood board. It’s super easy and doesn’t take up too much time. 

You need:

  • String or bakers twin in whatever color you want – I went for a natural look 
  • Metal clips
  • Wire (matching color to the clips)
  • Letters – I used the letters of my little lightbox which you can also buy separate from the lightbox but you can use any kind of letters you want
I started with bending the wire to form small hooks which I attached to the metal clips. 


Piastuff.blogspot.comPiastuff.blogspot.com

I knew I wanted my mood board to have three rows of letters. I started with the lowest one. To figure out where to place the string I grab one metal clip incl. hook and attached one letter to it to see how much space one letter would take up. Using my example clip I decided where to place my first string using two tiny nails. Then I repeated the process to find out where to place my second and third string.


After all the strings were attached to the wall I only had to decided what I wanted my mood board to say – and done!!


Piastuff.blogspot.com

This was such a fun and easy DIY project and I love the twist it gives to the kitchen – and all my visitors love it as well :) So what are you waiting for?

2017-04-25

Personalize your doormat – easy peasy DIY


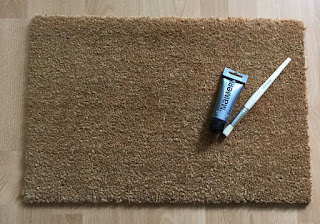
Most doormats are kinda boring. And the cute ones are usually way too expensive. As really wanted a welcoming doormat though I decided to DIY one – it’s a pretty easy peasy DIY which doesn’t take up a lot of time.

You need:
- Acrylic paint (I used black)
- Big round brush
- Plain doormat

piastuff.blogspot.com

First of all you should think about what you want your doormat to say. I like the phrase ‘oh, hello’ so my decision was made pretty fast. I also knew right away that I wanted to use an italic font. I used a sharpie to draft the phrase on the doormat and afterwards traced it with my brush. If you want to use a very specific font you can also print and cut out your phase and then stencil it on the doormat.

piastuff.blogspot.com


I really love the outcome and am happy that future visitor will be greeted by it. 

piastuff.blogspot.com


What do you think?

2017-03-23

Easy DIY homemade wall art

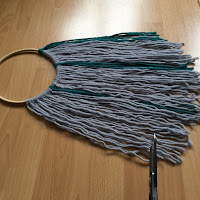
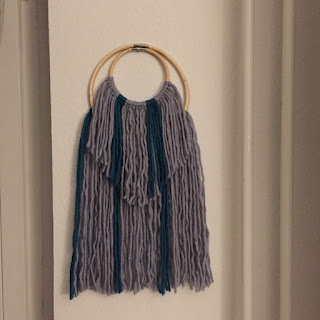
Have you recently seen all the new creative diy wall art and wall hanging on pinterest and instagram? Oh boy, I didn’t only see them, but I fell in love with them and I knew immediately: I want to try this out! 


There is kinda of an awkward wall in the living where it’s difficult to put something up as there are heating pipes on the wall and it’s set between two windows and thus kind of narrow. One of those wall hanging would be perfect for it though :) So I didn’t spend too much time thinking about it but ran to the next craft store and bought everything to get started right away.

You need:
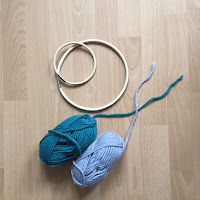
- 2 wooden hoopsà I got on small and one large one
- About 3 balls of wool / yarn
- Scissors

I decided to go with colors which are already present in the living room – grey and dark bluish green (matching the dining nook) and picked wool which was bit thicker and fluffier.


piastuff.blogspot.compiastuff.blogspot.com

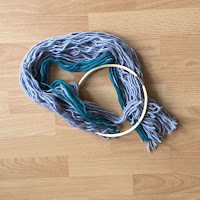
I started with the large wooden hoop and wrapped some wool around it to get an idea of how long I want the wall hanging to be. I started cutting the wool twice as long as I wanted it to hang, about 40 inch in total length. Once you have cut a bunch of wool strings you can start attaching it to the hoop: Fold the middle section of the wool over the hoop and pass the ends through (this is called a larkshead knot) and then repeat over and over. Carry out the same steps on the small hoop. I stopped once in a while to see how many more strings I want to add (and even after hanging the wall art you can still add some strings if you feel there is something missing :) ). 


piastuff.blogspot.compiastuff.blogspot.com

Once I reached the amount of wool string I wanted my favorite part started: trimming the wool – it’s just like giving your wall hanging a hair cut! I decided to cut some small edges into the string from the big hoop and give the small loop a pointy look. Afterwards I attached the small hoop to the large hoop and hung it on the wall.


piastuff.blogspot.com


I’m so happy with the outcome and it’s such an easy but pretty DIY with a great effect – all guests have asked about it and are amazed by its simple beauty.

What do you think?

2017-01-06

How to make a star / ornament out of paper bags -- easy DIY

I love honeycomb balls, tissues poms and paper lanterns – basically anything fragile made out of paper which can be hung from the ceiling catches my eye! This project did raise some discussions at home whether it’s a specific Christmas-DIY or not. My take on this is that it is an all year round decor – yes it can definitely be used during Christmas time but in my opinion it isn’t bound to the holidays at all!

To make these lovely stars / ornaments (or better: lovely addition to your home decor :) ), you only need 3 things:
  • paper lunch bags (you can use brown bags, white ones or any pattern of find and like),
  • scissors,
  • glue

For each star you need about 7-8 bags depending on the size of your bags and if you want the ornament to be more narrow or wide. I used 8 paper bags for my star.

1. Start with placing one bag in front of you (the bottom of the bag should point towards you, the opening of the bag away from you). Now fold the bag in half lengthwise and then crosswise. Afterwards fold the upper half of the bag diagonally so that a point forms in the middle. Set the bag aside for later.


2. Glue the other 7 bags on top of each other à place one bag in front of you, again the bottom of the bag should point towards you, the opening of the bag away from you. Spread glue on the bottom of the bag and along the middle of the bag (like an upside-down T)

3. Once all 7 bags are glued together grab the folded bag from step 1 and glue it on top.

4. Now cut along the folded diagonals.


  • (OPTIONAL: if you want your star to have a pattern cut out a small triangle on the lower half of each side of the bag)


5. Add glue to the star on top and then fan out the rest of the star in order to connect the bottom and the top bag.


Attached some string to the star – and you are DONE :)


As said before I love these stars and to me they are just as additional home decor season unrelated. What do you think
?

2016-11-23

'Tis The Season To Be Jolly -- Advent Time

I love the advent time and the spirit it brings. It’s like a slow and joyful countdown to Christmas. For me this is a time to calm down, enjoy, reflect on the past year and get into holiday mood; it’s a time I want to share with people I love, with friends and family.

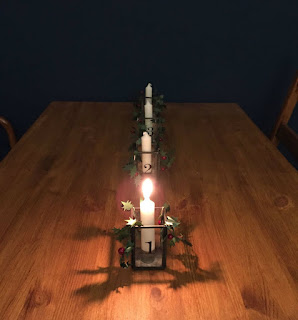
This year the first Advent Sunday is already the upcoming Sunday (a bit early for my taste...). I like the tradition of lighting a candle each Sunday before Christmas, drinking your tea, eating some cookies and being cozy.

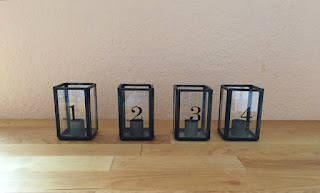
On a past trip to Scandinavia I stumbled across these Advent lights. In general I really love Scandinavian design and fell in love with these four little lights immediately. And it’s a huge plus that these are reusable endlessly :) 

Piastuff.blogspot.com

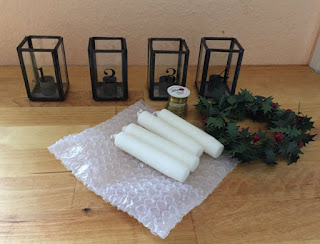
As the colors white, red and green are typical Christmas colors I decided to incorporate them in my Advent decoration.


Piastuff.blogspot.com

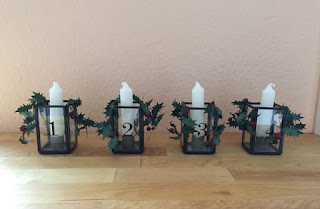
I chose four small white candles and got some faux wreath made of green leaves and red fruits. I took the wreath apart and used small pieces of it to decorate the little lights. Always making sure nothing is too close to the actual flame.


Piastuff.blogspot.com

Piastuff.blogspot.com


It’s a super simple and easy decoration but I absolutely love it! What do you think?
2016-08-24

How to hang up pictures - simple but perfect

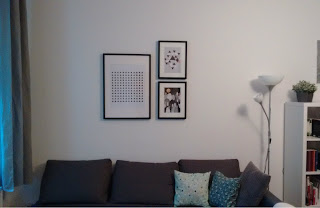
You know the feeling of having too many white walls? That’s exactly how I felt with the huuuuge white space above the couch. The more time passed the more it bothered me. So I started looking for nice pictures and posters. I didn’t really know what I was aiming for at the beginning, usually I just know what I don’t want which is a starting point as well :)

So I started looking at a lot of pictures online e.g. at Pinterest or other websites to get some inspiration. In the end I decided on three lovely prints I found on Juniqe I absolutely love the style of their art designs and that they offer each poster in various sizes.

I decided to get one large print and two small ones which were half the size of the large one. In my mind I already decided how to hang them up. I knew I wanted to get frames including white passe-partout as I felt they would highlight the prints really well. The big surprise came when I went frame shopping at Ikea and my wall design was destroyed as I hadn’t taken into account the size of the frame and the space between the frames. Suddenly I didn’t know anymore how to arrange the posters best.

Usually each frame has an inlay white or gray paper which has the same size as the frame. In order to find out how to hang up the frames the best I used washi tape and the inlay of the frame to simulate the arrangement. I ended up with three different approaches and finally settled for one. Using this method really help me to see how things would actually look rather than just trying to picture it in my mind. You can step back, look at it from different angles and look at it for several days before deciding. 

Piastuff.blogspot.com

The actual process of hanging the frames up was super easy as well – I just hammered the nails directly through the inlay and ripped it off afterwards. Thus I made sure I got exactly the wall design I wanted.

Piastuff.blogspot.com


I love the outcome – what about you?

2016-07-27

Upgrading the kitchen budget friendly – part two

Today I’m sharing part two of my kitchen upgrade. I’m so happy with the outcome and the whole room just feels very different!

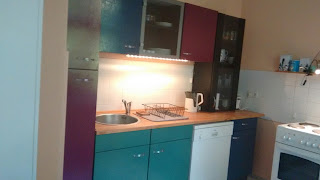
Here’s a before picture: you can see that the kitchen originally was very colorful. In my opinion the colors didn’t match to the wallpaper and they also didn’t really go well with each other. I just knew right away I had to somehow change this.

Piastuff.blogspot.com


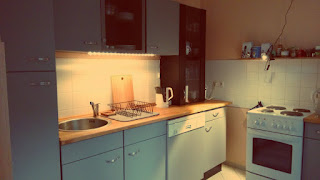
I remembered I had heard something about adhesive furniture foil and after a quick google search I found what I needed: an adhesive furniture foil explicitly for kitchen cabinets. As I didn’t wanted to paint the walls I was looking for a color that would match the apricot walls and would also work with the glass elements. I decided on a light gray and the matt version of the foil – if you go for the shiny version keep in mind that you can see finger prints etc on it.

Besides getting the foil I also bought a spatula which was recommended for the installation process. I was super motivated and immediately started working: I measured a cabinet, added 2in (3cm) on each side to make sure I can cover the sides and have a little bit extra, I cut the foil, cleaned the surface and started installing it using the spatula to get rid of the excess air underneath the foil. And it was just a disaster! Small bubbles everywhere. I tried to get rid of the air bubbles by using more pressure but then the spatula scratched the foil :(

So after covering one cabinet I stopped and thought “what have I gotten myself into???”. Obviously giving up wasn’t an option as I really wanted to get rid of all those colors. Also I had set my mind on covering the cabinets and my mind doesn’t let go that fast ;)

So the next day I did what I should have done the first time: I looked on YouTube and guess what, there are so many videos explaining different techniques to install adhesive foil! I decided to try out the ‘water technique’. It worked so well!

Unfortunately I didn’t document the process step by step. To sum it up: you still do everything I explained before just before sticking the foil to the cabinet you spray the cabinet with water and you also spray some water on the sticky side of the foil. The water film helps to adjust the foil and when pressing all the water out using the spatula all the extra air is removed as well, so no more air bubbles!

Piastuff.blogspot.com

And this is what the ‘new’ kitchen looks like! It definitely was some work but also a lot of fun and I only spend around $40!

What do you think?
2016-07-14

Upgrading the kitchen budget friendly – part one

When renting an apartment the kitchen is often part of the existing interior and there isn’t much you can do about it. However, that doesn’t mean you have to stick with whatever you get! On the picture you can see that the kitchen originally was super colorful – I have no idea who would want (and actually buy) this style of kitchen cabinets. The colors didn’t match to the wallpaper and they also didn’t really go well with each other, at least in my opinion.

So after seeing the kitchen for the first time, I just knew I had to do something about it. During the apartment tour the landlord had already said that the cabinets can be upgraded as long as they don’t get destroyed. After checking out the fronts it was clear that they couldn’t be painted as they were laminated. I remembered hearing something about adhesive furniture foil and that’s when the whole kitchen upgrade began to form in my head :)


Piastuff.blogspot.com

Besides the colorful kitchen cabinets the counter top are made of real wood and as the previous tenant didn’t really take care of them the wood swelled up especially around the sink. So this was something that needed to be taken care of as well. I decided to do this first – I knew I could stand all the colors at least for some time but as I really enjoy cooking and baking I really wanted to get those counter tops fixed asap.

I went to a local hardware store and asked for advice. I had never had a wooden counter top and wasn’t sure how to maintain it or how to fix the damage. I ended up getting several sanding papers with different grain sizes and some natural & organic oil for woods.


I started off sanding done the kitchen counter using the largest grain size. Once I was done, I repeated the process with the next smaller sanding paper and so on. In between I whipped down the sand dust. After I was done you could already feel a big difference as the surface was just a lot smoother. The next step was to oil the wood. As I knew it would get in touch with food I it was really important to me to get an all organic oil. I used a brush to spread the oil and whipped of the access amount with an old cloth. I repeated the process after 24h. Unfortunately you can’t really see the difference but mainly feel it! I also pay attention that no water sits on the counter top and will repeat the oiling every couple months.

I’ll share the ‘how to’ install the adhesive furniture foil next :)

2016-06-24

Preparing the balcony for hot summer days & nights

As soon as the first hot summer days arrived I knew I wanted to get the balcony ready: sitting outside in the morning with a coffee, in the afternoon with a good book or at night with a cocktail – I just love all those things.

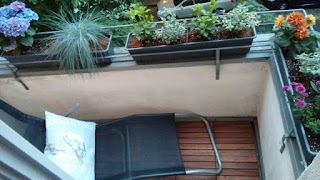
So first of all I decided to cover up the tile floor of the balcony with some lovely wooden tiles. It was super easy and already made a huge difference – it looked and felt (mainly for the feet) so much more comfortable!

Piastuff.blogspot.com

Next thing I bought some plants. I mixed evergreens with flowers. I especially love the hydrangea, always wanted to have some :)

Piastuff.blogspot.com

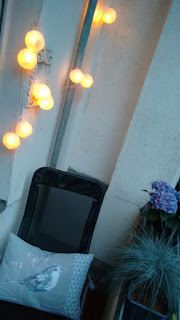
The balcony is kinds small, so either one person can lie comfortable in a deckchair or two people can sit with a tiny table –both scenarios work for me. I added some fairy lights to use the balcony even after the sun sets.
Piastuff.blogspot.com

As the balcony is quite narrow getting a good shot isn’t easy (I might update these later..). 

Hope you love it as much as I do,

2016-06-15

Lovely homemade summer shirts using an easy pattern from 'la droguerie'

Summer just hit us, so every day I look at my closet and think “What can I wear today? What is light, but comfy, looks nice and is appropriate for work”… Suddenly I remembered that I bought a very cute shirt pattern from la droguerie while visiting France some time ago! They have such lovely little craft and fabric stores with great patterns and lovely colors.

So I started looking for the pattern (which inspired me to re-do my diy-nook which I’ll hopefully share soon :) ). I made these two lovely summer shirts – it was really easy and fast and I just had a great time. It was the first bigger project I did with my new sewing machine the Brother Innov-Is '27  – I’m really happy with it and it sews sooo much smoother than my old machine. 


I hadn’t realized how much I missed sewing – all the tiny and precise steps and you just need to focus on what you’re doing, no room for other thoughts kinda like meditating. I turned up the music, opened my window, let the sun in and just sewed it away :)


Piastuff.blogspot.comPiastuff.blogspot.com


I first sewed the blue one and then made some small adjustments for the pink one – it’s a bit longer and slimmer. I used really thin fabric and just love the color combination of the fabric and the bias binding.  What do you think?
2016-04-18

Meet my new bff aka my new sewing machine

Great news: I finally bought a new sewing machine and I just can’t stop smiling! So let me introduce you to my new bff ;)

I’m a self-taught sewer and my first sewing machine was a basic beginners machine. As I didn’t know whether I would actually use it a lot or if I actually liked sewing I didn’t wanted to spend so much money on my first machine. And I actually hardly used it for the first year. Then motivated by a lovely friend of mine I really got into sewing and soon realized that my machine had its limits especially when it came to tricky stuff. Sometimes I got really impatient with it but I continued using it for another two years always telling myself that ‘soon’ I would buy a new one. At some point I believed that ‘soon’ had finally arrived and I passed my sewing machine on.

However, it took me about five months to actually buy a new one…and finally last week I did :D I had a rough idea which features I wanted and I kinda knew how much I wanted to spend. In the end I really love sewing and the process of producing my own stuff but it still is a hobby and thus I wasn’t willing to spend a fortune.

.


I decided to buy the machine at a local retailer as I wanted to try out the different options and have a place to turn to incase the sewing machine needs to get fixed. In the end I settled for this lovely sewing machine by ‘brother’ the Brother Innov-is '27 (I think the pink kinda got me hahaha) and I couldn’t be happy with my choice – so hopefully there’ll be more sewing blogposts from now on!

2016-04-12

New DIY or How to Highlight Small Things

When I saw those little reindeer skulls I just knew I wanted to have them. I’m usually not the skull-decoration kind of person but these somehow fascinated me….I really love their color especially (and obviously) the copper one. And they are handmade and fair-trade which is just a huge extra plus!

Piastuff.blogspot.com


As I try not to spend too much money on decoration and other items I often set myself a goal and when I fulfill it I treat myself with something as a reward. And those little reindeer skulls just seemed like a perfect reward hahaha

Anyway, I felt like they needed to be placed on a colorful background in order to really shine to their full potential. As you might remember I painted my dining nook in a deep blue color. Originally I was planning to hang them there but then instead I decided on some copper polka dots. I tried adding them to the polka dots but it just didn’t work.

In the end I decided to place them on a piece of wood which I would color before and hang them in the hallway across of my San Francisco map.

I started with figuring out the right size of background I need: I spread out the three sculls and once I was happy with the arrangement I measured the space needed. In a hardware store I bought a thin piece of wood as I did for my San Franciscomap DIY.

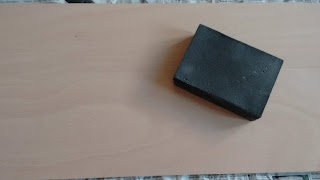
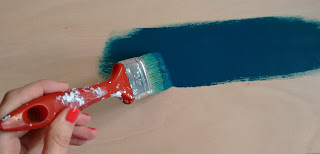
Then I sanded the wood down so it would absorb the color better. I still had some color left from painting the dining nook so despite the fact that it was wall paint I used it on the piece of wood and it worked out fine.

Piastuff.blogspot.com

Piastuff.blogspot.com


Afterwards I used some Tesa Power Strips (I love power strips :D ) to attach the reindeers to the piece of wood. I still had some spiked left from the San Francisco map DIY so I used them to attach the piece of wood to the wall.

Piastuff.blogspot.com


I totally love the result – although the reindeer skulls are quite small they really stand out in front of the deep blue color. Would you hang this up?